Google Meet is one of the most popular video conferencing services, with a user-friendly UI and a range of features. The video calling tool integrates with other Google products like Gmail and Google Calendar and simplifies the process of scheduling and joining meetings.
Now that face-to-face communication has gotten harder due to more people working from home, video conferencing options have become more important than ever to today’s businesses.
How to start a new meeting on Google Meet
If you've ever scheduled a Google Hangout, you may wonder how it's different
from Google Meet. Google Hangouts is a free tool provided with Gmail that allows you to jump into a video call, whereas Meet is a more robust platform with more features that is provided under Google Workspace (formerly G Suite). Google Meet is preferable in a business setting.
Create a Google Meet in 7 easy steps
Here’s how to create a Google Meet session for your team.
1. Go to Google Meet
Visit meet.google.com, which will take you to the Google Meet homepage where you can schedule a meeting.
2. Click “New Meeting”
Click on the green button that says "New Meeting" in the lower right corner of the page. You may need to sign into your Google account first, or create one if you haven't done so already.
3. Choose "Schedule in Google Calendar"
After clicking on the button, you will be given three choices: get a meeting link to share, start an instant meeting, or schedule a meeting in Google Calendar. The first two options involve starting a meeting right away, so choose the last option to schedule a meeting for later.
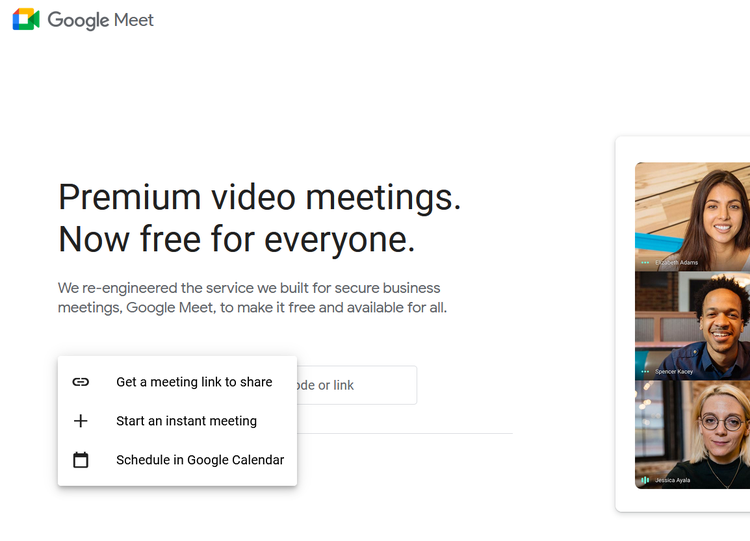
Click on the “Schedule in Google Calendar” option to schedule a meeting. Image source: Author
4. Fill out the meeting details
You will be provided with a form to fill out with all the meeting details. You'll notice it looks very similar to creating a Google Calendar entry, and it works basically the same way -- except, in this case, it also creates a Google Meet link that invitees can click when the scheduled time arrives.
Fill out the title of the meeting; check with attendees’ work schedules and then choose date, time, and duration; select whether this is a one-time or repeating event; add a description; add guests; and include any other information you want. Once you are finished, click "Save" -- Google automatically generates a special meeting link and phone number for your meeting, so you don't have to do anything there.
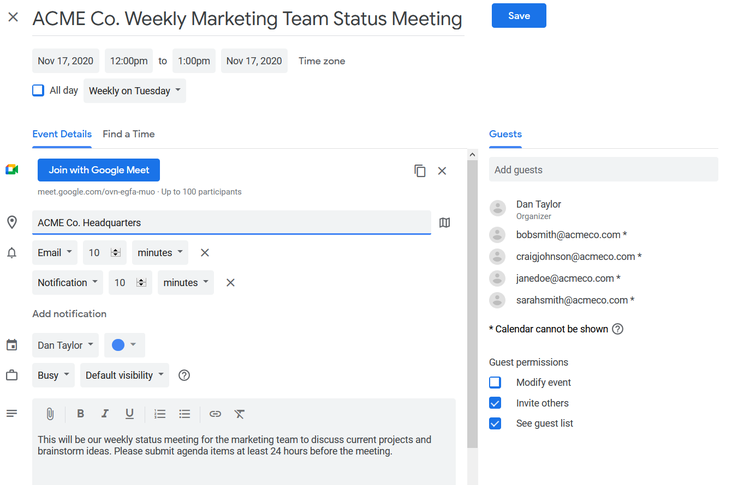
Fill out a few simple details about the meeting and click “Save.” Image source: Author
5. Click "Join with Google Meet" when ready to start
After you have saved the meeting, an entry will appear on your calendar. When the appointed time comes, click on the calendar entry and a window will pop up with a big blue "Join with Google Meet" button. Click on that button. Note: The meeting invite will also include a Google Meet phone number and pin you can call if an attendee prefers to dial into the meeting rather than join on their computer.
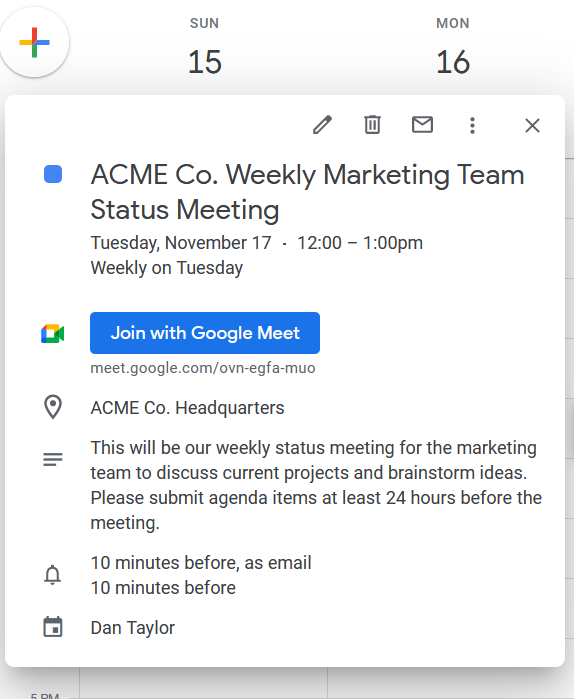
A big blue “Join with Google Meet” makes joining a scheduled meeting easy. Image source: Author
6. Click "Join Now" or "Present"
You will be taken to a waiting room of sorts where you can choose whether to allow your camera and your microphone. Once you've made that selection, click the "Join Now" button to the right to join the meeting. Or, click "Present" if you are the presenter and need to share your screen.
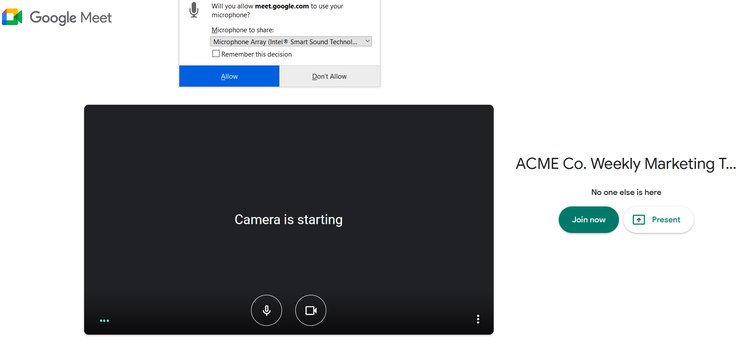
Adjust your settings before joining the meeting. Image source: Author
7. Navigate meeting options
Now you're in the meeting. While in the meeting, you can turn your camera and microphone on and off, as well as present if the host gives you permission to do so. There is also a chat function, which is useful if you are having difficulties or just want to make a comment without interrupting the presenter. To leave the meeting, click the red phone icon at the bottom.

No comments:
Post a Comment